 USD
USD EUR
EUR GBP
GBP CAD
CAD AUD
AUD
A Comprehensive Guide To Microlinks
What are microlink extensions?
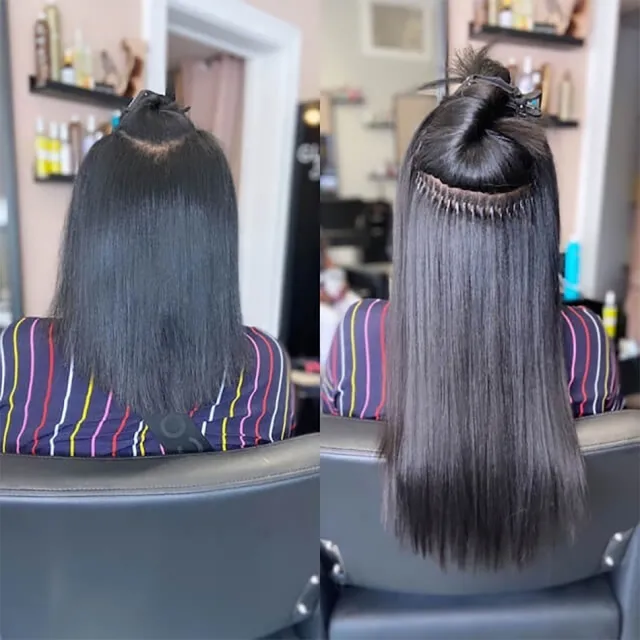
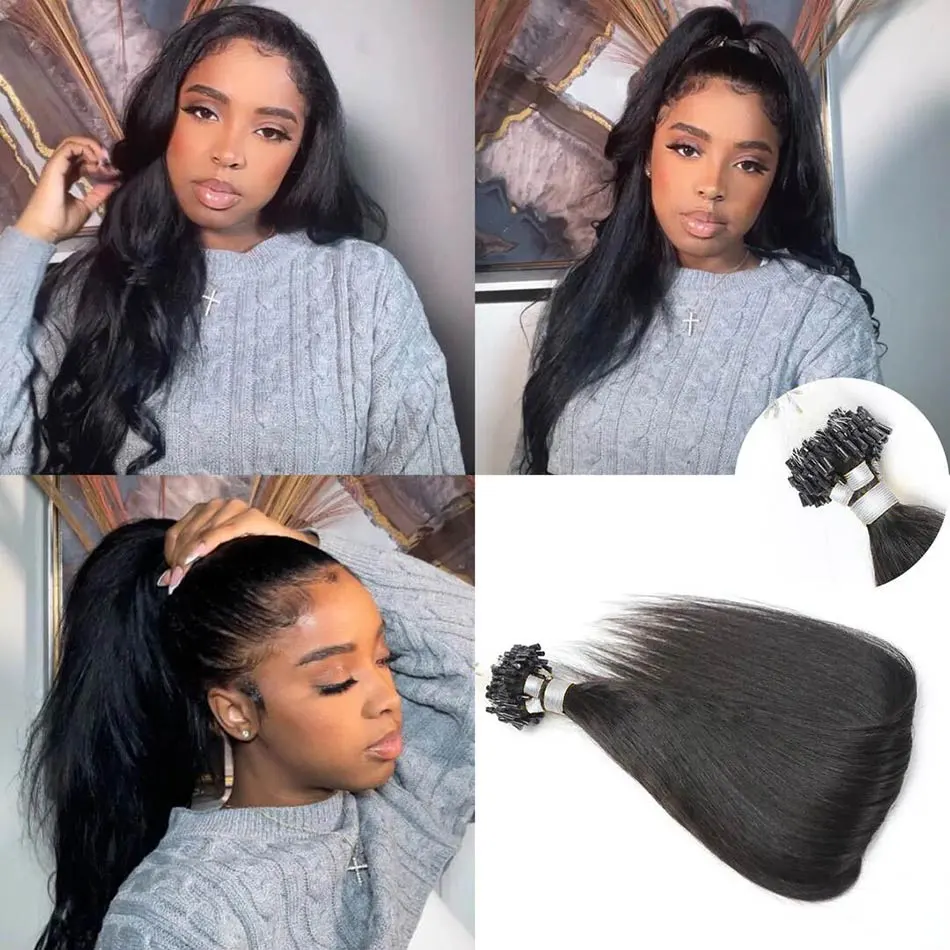
Microlinks is a safe way to add hair length and volume by attaching hair strands with very small and lightweight silicone beads. This extension method requires no heat, no adhesive, and no braiding at all. Thus, it's also named microbeads and cold fusion hair extensions.
Types of microlink extensions:
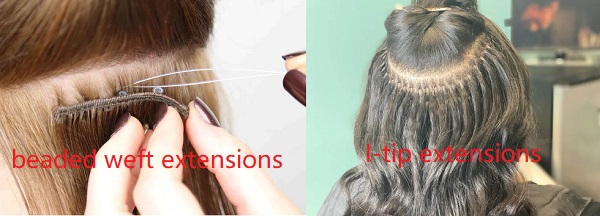
There are typically two types of microlink extensions available on the market: I-tip hair extensions and beaded weft extensions.
An I-tip hair extension is a strand of hair extension attached to a microbead at the root.
A beaded weft extension is a hair piece that has microbeads attached at the root.
These two types of microlink extensions all require no heat, no glue, and no braiding. They are all safe and easy to install and remove. The major difference between these two types of microlinks are as follow:
- Beaded weft extensions are weft hair while I-tip hair extensions come in strand by strand.
- I-tip hair extensions take a longer time to install and remove than beaded weft extensions.
- The dressing and removal service of I-tip hair extensions is typically more expensive.

Benefits of getting microlinks
- Natural in appearance: The beads of microlinks are tiny and typically have been dyed into the same color as the hair extensions, so they can hide seamlessly while applying to natural hair.
- Easy to install and remove: Actually, the installation and removal of microlinks are not difficult. You just need to clamp the beads down with a plier to attach the microlink extension to your natural hair strand by strand. There are no special skills required, just patience.
- Breathable and comfortable: Microlinks save your hands from the braiding process and expose your natural hair. This brings premium breathability and comfort to your natural hair and scalp while also smoothing your daily hair care routine.
- Long duration: Typically, with proper installation and maintenance, microlinks can last for about 6-8 weeks. It's a relatively long-term weaving option.
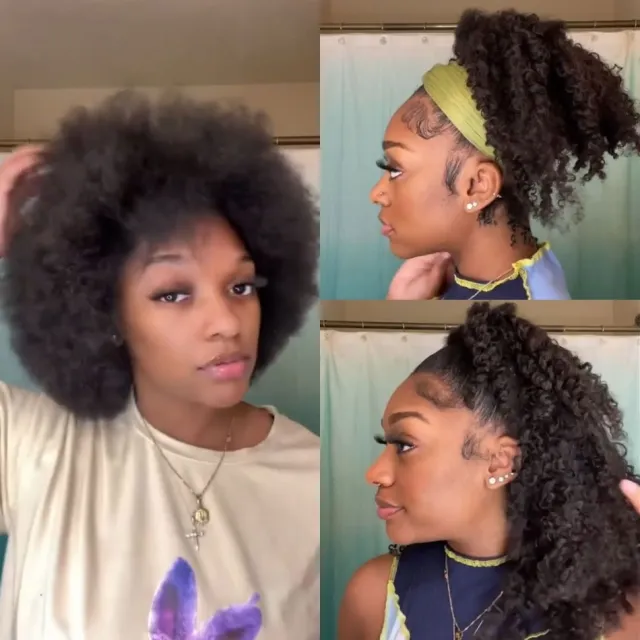
- Numerous hairstyle options: Microlink extensions are undetectable after being applied to natural hair. This gives versatility to styling hair. You can almost experience all the hairstyles you desire on microlinks.
- Reusable: With proper care, high-quality microlink extensions can be reused about 3-4 times during their lifespan.
- Convenient daily hair care routine: With microlink extensions, you don't need to braid your natural hair into cornrows or cover your natural hair with a cap. Thus, this allows your daily hair care routine to proceed more smoothly than other extension methods.
Can microlinks lead to breakage?
Microbeads are a safe and easy extension method that requires no glue, no gel, and no heat. This is also why it has gained popularity in recent years. However, no matter which extension method you choose, improper installation and maintenance could lead to breakage. Moreover, it is inevitable that some hairs will get shed while removing the microbeads. But it's normal to shed between 50-100 hairs per day even with the most careful upkeep. Don't be too nervous. And get professional help from a certified stylist to avoid unnecessary damage while removing microlinks.
Factors you need to consider before getting microlinks:
Here are some factors that you need to take into consideration if you have never tried microlinks before.
- Your natural hair length: Microlink extensions are not suitable for very short hair. Microlinks may not be the right option for you if your natural hair is so short that it is difficult to hide the beads. We would suggest your natural hair should be longer than 4 inches if you want to try microlinks.
- The condition of your scalp and natural hair: With any extension method, the extensions would inevitably bring extra tension and weight to your scalp and natural hair. So if your natural hair and scalp are in pretty damaged condition, microlinks might lead to breakage.
- Hair type: There are typically 3 types of hair on the market: virgin hair, Remy hair, non-Remy hair, synthetic hair, and mixing hair. We have made a comparison between these hair types in our previous post: Difference between Virgin and Synthetic Hair, click and read more. High-quality microlinks are made of virgin hair or Remy hair. This type of hair extension is more natural, durable, and reusable. You should invest in microlink human hair extensions if you have enough money.
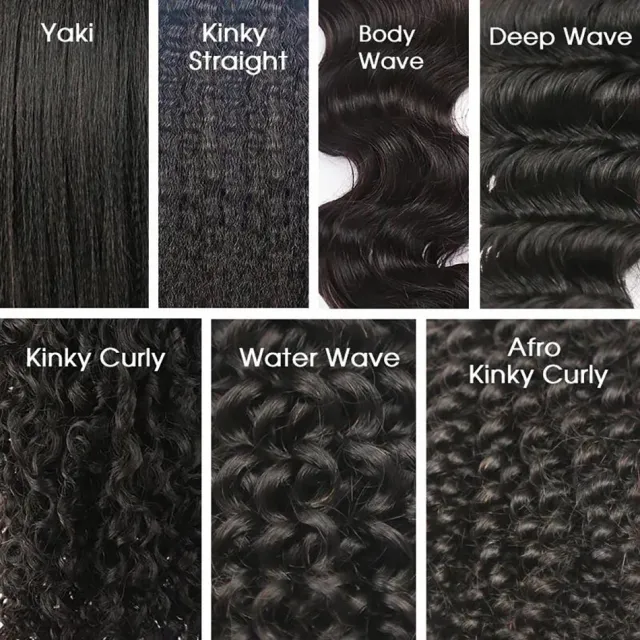
- Your hair texture: With microlinks, your natural hair is exposed outside of the weave. So to achieve a seamless appearance, you need to opt for hair extensions that are either similar in color and texture to your natural hair. Elfin hair provides various textures for your choice: kinky straight, kinky curly, sleek straight, deep wave, body wave, deep curly, loose curly, etc.
Do microlinks damage your natural hair?
Actually, no matter which extension method you decide to opt for, improper installation and maintenance can lead to breakage. But microlinks are a safer choice among all extension methods. Just as its name implies, the installation and removal of microlinks require no heat, no glue, no gel, and no braiding. It's one of the safest extension methods that also brings less tension to the scalp and natural hair. Because microlinks are attached to your hair strand by strand and the beads are typically very lightweight.
How long can you keep microlinks on?
Microlinks can last for about 6-8 weeks with proper maintenance. Keep up with your established routine: detangling and washing your hair as you normally would. Wash your microlinks at least once every two weeks. Avoid applying too much heat to your hair. If heat treatment is necessary, give a spray of heat protection before you do so. Moreover, we suggest you go back to the salon every 4-5 weeks to reposition and retighten the beads.
Can you install or remove microlinks yourself?
The safest choice is to let them be done professionally in the salon if it’s the first time for you to get microlinks. If you want to attach microlinks at home, you'd better ask another pair of hands for assistance. Because I-tip hair extensions are installed strand by strand, it should take a long time if you try to take them out yourself. What's more, it's a bit difficult when clamping the beads at the back of your head with a plier.
How much does wearing microlinks cost?
The cost of microlinks varies depending on hair type, hair length, the method of installation you opt for, your stylist, your location, etc. The general charge ranges from $200 to $400.
How many microlink extensions do you need?
A full head of extensions typically requires about 200-300 strands. If you desire a lightweight result for a half head, 100-150 strands of microlinks are enough.
How to wear microlinks?
Method 1: For I-tip hair extensions
Step 1: Prepare your natural hair
Detangle your hair with a wide-tooth comb. Shampoo thoroughly with a mild shampoo and deep condition your hair for moisture. Rinse out the conditioner and towel dry your natural hair.
Step 2: Leave out the edges of your natural hair
Section and braid about 1-2 inches around the edges of your hair to leave out. This is the secret to creating a natural hairline so that you can achieve the ponytail style naturally.
Step 3: Section your hair
Use a rattail comb to create a horizontal part about 0.5 inches above the leave-out section of hair near your nape. Divide this horizontal part into small strands evenly.
Step 4: Attach Microbeads
Grab a small strand of natural hair and slide it through the beads to attach the I-tip hair extension with a loop thread. Be aware that they are not very close to your scalp. Use a plier to clamp down the beads of the I-tip. Attach I-tip extensions strand by strand until this layer is complete. Continue to section your hair and attach microlinks until you finish a full head.
Step 5: Style your hair
Take out your leave-out hair and use a wide-tooth comb to blend it well with your I-tip extensions. And now you can rock any style you desire.
Here is a video tutorial to show how to install I-tip hair extensions on short hair:
Method 2: For beaded weft extensions
Step 1: Prepare your natural hair
Ensure your natural hair is healthy, clean, and detangle before diving into the extension process.
Step 2: Leave out your hair
Leave out about 1-2 inches around the edges of your natural hair and the area you desire to part your hair. To leave them out, clip them up.
Step 3: Section your hair
Create a horizontal part at about 0.5-1 inches above the leave-out edge of the bottom section. Pick up a piece of beaded weft and
Step 4: Apply the beaded wefts
Grab a tiny pinch of hair at the beginning of the horizontal part, take the wired crochet hoop through a microbead and then attach the weft to your hair. Clamp the beads firmly to your natural hair with a plier. Repeat to attach the other beads of the weft to your natural hair. Make sure that you apply the weft near your scalp but not too close, so that your beaded weft looks more flat and seamless. Continue dressing the beaded weft extensions until you reach the edges of the leave-out section.
Step 5: Style your hair
Undo your leave-out hair and comb it to blend well with the extensions to create a natural hair look. And now you can style your hair as you desire.
Here is a video tutorial to show how to install beaded wefts:
How to maintain microlink extensions?
Here are some tips for your daily routine with microlinks:
Tip 1: Wash your hair as you normally would, once a week or every two weeks is recommended.
Tip 2: Never ignore your scalp when washing your hair. Don't forget to massage your scalp with your fingertips. But avoid applying conditioner or oil at the roots to prevent beads from slipping.
Tip 3: Avoid applying heat to your hair. If it is necessary, spray your hair with heat protection before you do so. Towel dry your hair after washing, or blow it dry on the lowest heat setting if you are in a hurry.
Tip 4: Wrap your hair up with a satin scarf before heading to bed.
Tip 5: Detangle your hair with a wide-tooth comb every day, especially before your washing day.
Tip 6: Go back to the salon to reposition the microbeads and detangle your hair every 6 weeks.
Tip 7: Remove your microlinks on time. Remove your micro links every 2 months after installation to give your natural hair a break.
How to remove microlink extensions?
Step 1: Clip your hair up and expose the bottom layer of microlinks.
Step 2: Use an opener designed for removing microbeads to clamp the beads into a ring shape. Gently take off the microbeads strand by strand until you finish this layer.
Step 3: Apply a large amount of hair conditioner at the roots, scratch out the dirt and detangle the hair with a rattail comb.
Step 4: Once you finish one layer repeat to expose the next layers to remove the beads. And then smooth your hair. Continue to do so layer by layer until you finish a full head.
Step 5: Thoroughly wash your hair with a mild sulfate-free shampoo and make a deep condition to add moisture. Give your hair a break for a few days if possible.
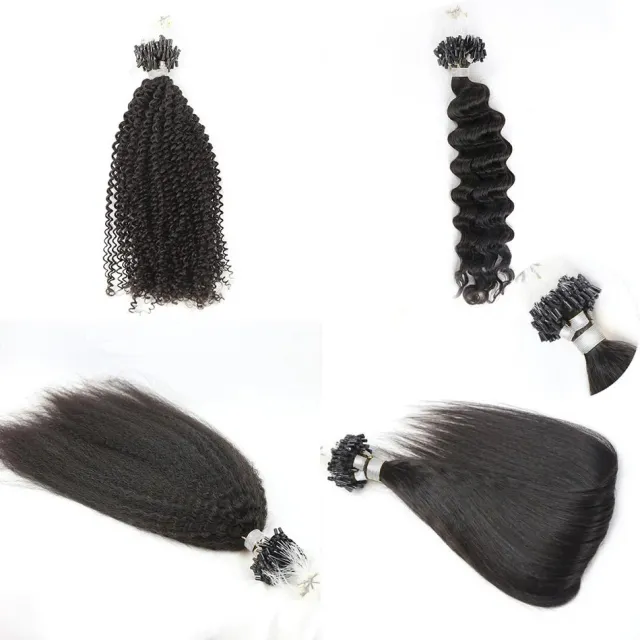
Where to buy I-tip hair extensions of high quality?
Not all hair vendors offer microlinks, but Elfin Hair does and provides the best quality microlink extensions. All our microlink hair extensions are made of 100% human hair. No matter which hair textures you desire, Elfin Hair has got you covered. We provide a multi-choice of microlinks to flatter black hair. All microbeads can be restyled as you desire and can be reused 3-4 times!
Conclusion:
Microlink extension is a relatively safe and easy extension method that is pricier but requires some upkeep. We hope that this post has answered all your questions about microlinks. If you still have questions, please contact our consultants online. We are pleased to solve all your confusion about hair extensions.
Related Posts:
All The Basics You Need To Know About Microlinks