 USD
USD EUR
EUR GBP
GBP CAD
CAD AUD
AUD
How To Do Heatless Curls?
Welcome to our latest guide on achieving beautiful, bouncy curls without the use of heat styling tools! In this post, we'll explore various methods and techniques for creating stunning heatless curls that not only protect your hair from damage but also offer long-lasting results. From simple braids to inventive sock curls and foam rollers, you'll discover the perfect method that suits your hair type and desired curl pattern. So, let's dive in and learn how to embrace your natural beauty with these easy-to-follow, damage-free curling techniques. Say goodbye to heat damage and hello to gorgeous, healthy curls!
Do heatless curls work?
Yes, heatless curls do work and can create beautiful, long-lasting curls or waves without the need for heat-styling tools. The effectiveness of heatless curls largely depends on factors such as your hair type, texture, length, and the specific method you choose.
Heatless curls are an effective and damage-free way to create curls and waves without using heat-styling tools. They work on various hair types and textures, but the results depend on the method used and individual hair characteristics. For best results, start with damp hair, use a leave-in conditioner or curl-enhancing product, be patient while allowing the hair to dry, and experiment with different methods to find the one that works best for you.
How to get heatless curls?
There are several methods to create heatless curls, and the best one for you will depend on your hair type, length, and desired curl pattern. Here are some popular heatless curling techniques:
Method 1: Sock curls
- Take a clean, dry sock and cut off the toe part.
- Dampen your hair slightly, and divide it into sections.
- Wrap a section of hair around the sock, starting from the ends and rolling up towards your scalp.
- Tie the sock into a knot to secure it in place.
- Repeat with the remaining sections.
- Sleep with the socks in your hair overnight.
- In the morning, gently remove the socks and loosen the curls with your fingers.
Method 2: Headband curls
- Place a soft, stretchy headband over your head, like a crown.
- Dampen your hair slightly, and divide it into sections.
- Take one section and wrap it around the headband, starting from the front of your head and moving toward the back.
- Repeat with the remaining sections.
- Sleep with the headband in your hair overnight.
- In the morning, remove the headband and use your fingers to separate the curls.
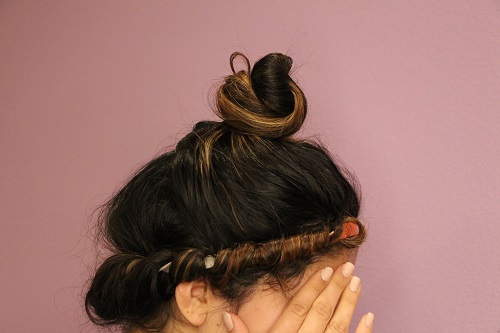
Method 3: Twist and pin curls
- Dampen your hair slightly and divide it into sections.
- Take a section of hair and twist it away from your face, from root to tip.
- Wrap the twisted hair into a small bun and secure it with bobby pins.
- Repeat with the remaining sections.
- Allow your hair to dry completely, either by sleeping on it overnight or waiting for several hours.
- Once dry, remove the bobby pins and gently loosen the twists to reveal the curls.
Method 4: Bantu knots
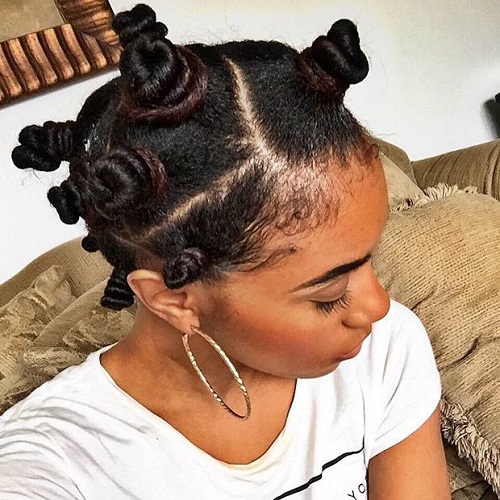
- Dampen your hair slightly and divide it into small sections.
- Take a section and twist it from root to tip.
- Wrap the twisted hair around itself to create a small knot, then tuck the end under the knot to secure it.
- Repeat with the remaining sections.
- Allow your hair to dry completely, either by sleeping on it overnight or waiting for several hours.
- Once dry, remove the knots and use your fingers to separate the curls.
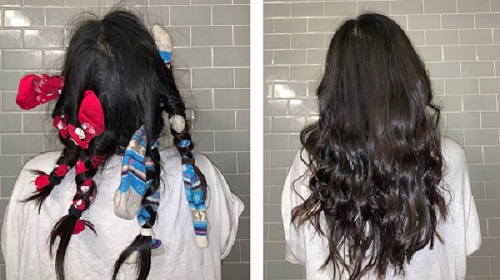
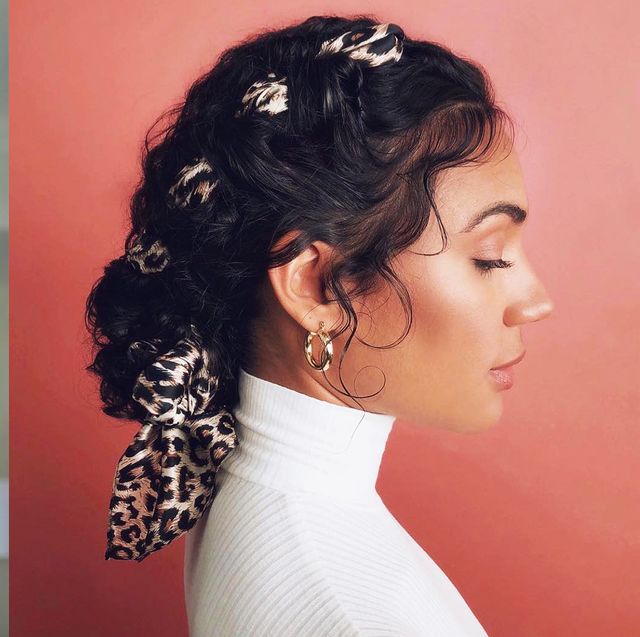
Method 5: Braids
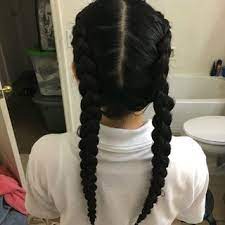
- Dampen your hair slightly and divide it into two or more sections, depending on the desired curl size.
- Braid each section, making sure to braid tightly for more defined curls or loosely for softer waves.
- Secure the braids with hair ties.
- Sleep with the braids in your hair overnight.
- In the morning, remove the hair ties and gently undo the braids to reveal the curls.
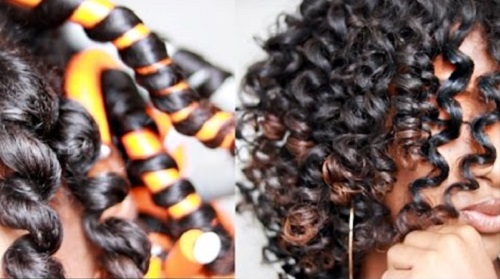
Method 6: Foam rollers
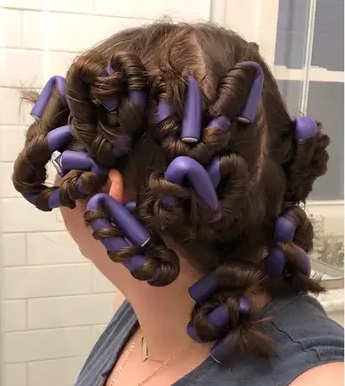
- Dampen your hair slightly and divide it into sections.
- Take a section of hair and wrap it around a foam roller, starting from the ends and rolling up towards your scalp.
- Secure the roller in place using the attached clip or bobby pins.
- Repeat with the remaining sections.
- Sleep with the foam rollers in your hair overnight or leave them in until your hair is completely dry.
- Gently remove the rollers and use your fingers to separate the curls.
Method 7: Paper towel or rag curls
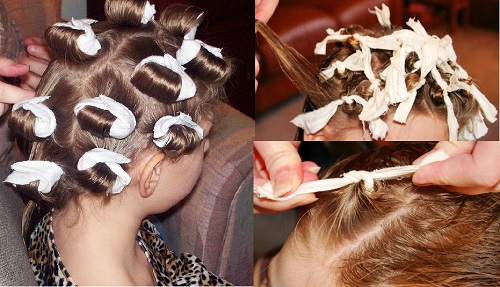
- Cut an old t-shirt or use paper towels to make strips (approximately 1-2 inches wide and 8-10 inches long).
- Dampen your hair slightly and divide it into sections.
- Take a section of hair and wrap it around a strip of fabric or paper towel, starting from the ends and rolling up towards your scalp.
- Tie the ends of the strip together to secure the curl.
- Repeat with the remaining sections.
- Sleep with the strips in your hair overnight.
- In the morning, gently untie the strips and separate the curls with your fingers.
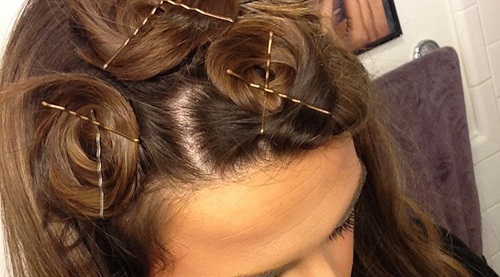
Method 8: Pin curls
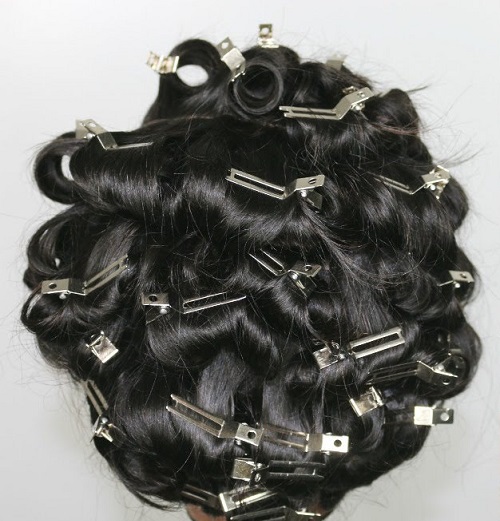
- Dampen your hair slightly and divide it into small sections.
- Take a section of hair and wrap it around your fingers or a small, cylindrical object (like a makeup brush handle) to create a curl.
- Slide the curl off your fingers or the object, keeping its shape intact.
- Press the curl flat against your scalp and secure it with a bobby pin or a pin curl clip.
- Repeat with the remaining sections.
- Allow your hair to dry completely, either by sleeping on it overnight or waiting for several hours.
- Once dry, remove the pins or clips and use your fingers to separate the curls.
Method 9: Silk or satin scarf
- Dampen your hair slightly and divide it into two sections.
- Twist each section tightly, starting from the roots and working your way down to the ends.
- Wrap the twisted sections around each other, creating a twisted bun.
- Secure the bun with a hair tie or bobby pins.
- Wrap a silk or satin scarf around your head to protect your hair while you sleep.
- In the morning, remove the scarf and gently unravel the twists to reveal loose, beachy waves.
Each of these heatless curling methods can produce different results, so feel free to experiment and find the technique that best suits your hair type and desired style. Remember to apply a leave-in conditioner or styling product before creating heatless curls to help maintain the curl pattern and reduce frizz.
Remember to use a leave-in conditioner or curl-enhancing product before creating heatless curls to help hold the curl pattern and prevent frizz. Experiment with these methods to find the one that works best for your hair type and desired curl outcome.
How long do heatless curls last?
In general, heatless curls can last anywhere from one day to several days. The longevity of heatless curls can vary depending on factors such as your hair type, texture, the specific method used, and the products applied. Here are some tips to help extend the life of your heatless curls:
Tip 1: Use hair products
Apply a leave-in conditioner or curl-enhancing product before creating the curls to provide extra hold and reduce frizz. Once the curls are set, use a light hold hairspray to help maintain the curl shape throughout the day.
Tip 2: Start with clean hair
Freshly washed and conditioned hair tends to hold curls better than dirty or greasy hair. However, avoid creating curls on soaking wet hair, as it may not dry fully while setting the curls.
Tip 3: Be gentle
When unraveling the curls or during styling, use your fingers to separate the curls gently, and avoid brushing or combing, as this can lead to frizz and loss of curl definition.
Tip 4: Maintain at night
To preserve your curls overnight, sleep on a silk or satin pillowcase, which reduces friction and helps maintain the curl shape. Alternatively, you can loosely gather your curls on top of your head using a soft scrunchie to create a loose "pineapple" hairstyle, which minimizes crushing the curls while sleeping.
Tip 5: Refresh as needed
If your curls start to lose their shape, you can dampen your hair slightly and use a bit of leave-in conditioner or curl-refreshing spray to revive them.
Remember that hair types and textures differ, so the longevity of heatless curls may vary for each individual. Experiment with different methods and products to find what works best for your hair and to maximize the duration of your heatless curls.
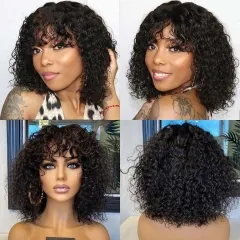
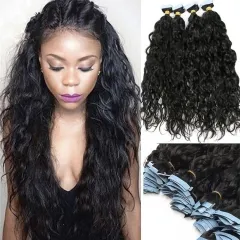
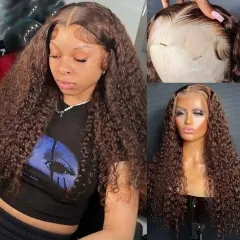
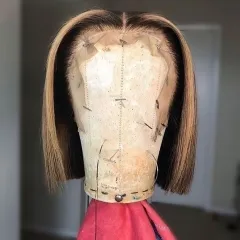
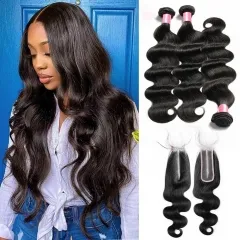
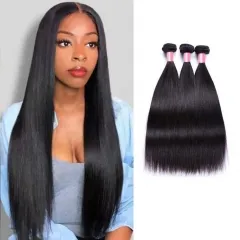
Get beautiful curly hair for black women from Elfin Hair:
 40%
40%
OFF Sale-
$67.44
$112.62(855) (529)

 40%
40%
OFF Sale-
$67.50
$112.72(459) (369)

 40%
40%
OFF Sale-
$220.12
$367.60(631) (581)

 50%
50%
OFF Sale-
$100.82
$201.64(745) (377)

 40%
40%
OFF Sale-
$80.93
$135.16(991) (649)

 47%
47%
OFF Sale-
$85.63
$162.70(1903) (1974)

 40%
40%
OFF Sale-
12A 【3PCS+13*4 Lace Frontal】Peruvian Body Wave Unprocessed Virgin Hair With 1PC Lace Frontal Closure$183.80
$306.95(1330) (380)

 47%
47%
OFF Sale-
$88.63
$168.40(1483) (579)

Conclusion:
Heatless curls offer a fantastic way to achieve stunning, long-lasting curls while minimizing the potential for hair damage caused by heat styling tools. By exploring the various methods and techniques outlined in this post, you can find the perfect approach tailored to your hair type, texture, and desired curl pattern. Remember to experiment with different techniques, use suitable hair products, and practice patience to ensure the best results. With heatless curls, you can enjoy gorgeous, bouncy curls and waves while preserving the health and integrity of your hair. So go ahead, give these methods a try, and embrace the natural beauty of your damage-free curls!
Related Posts:
8 Tricks To Get Gorgeous Curls Without Heat Or Products
10 Chic Curly Hairstyles For Black Women
Must-Have! Gorgeous curly wigs you shouldn't miss