 USD
USD EUR
EUR GBP
GBP CAD
CAD AUD
AUD
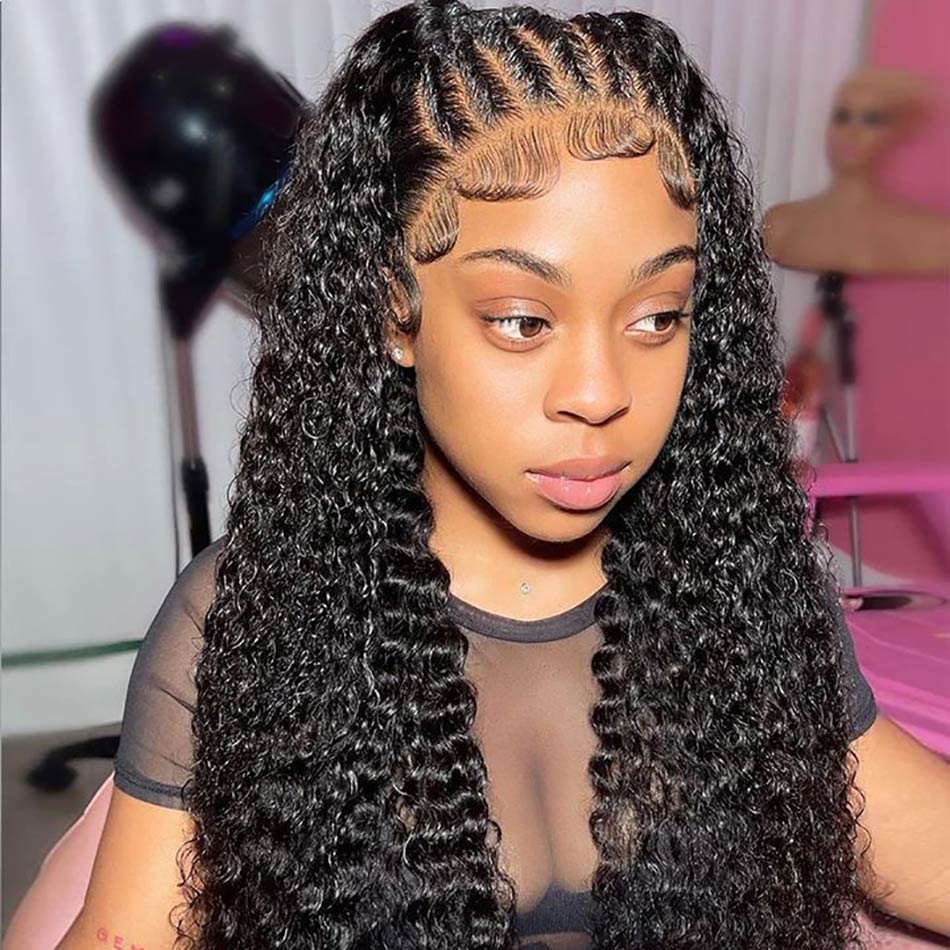
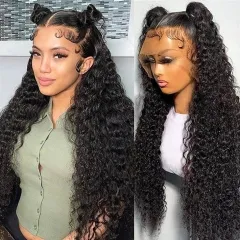
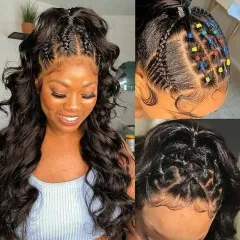
DIY Tutorial: Curly Hair Half Sew-In With Braids In Front
Welcome to the DIY Tutorial: Curly Hair Half Sew-In With Braids In Front. This article will guide you through the process of achieving a captivating and stylish hairstyle that combines the beauty of curly hair with the added charm of braids. Whether you're looking to create a versatile look for a special occasion or simply want to switch up your everyday style, this tutorial will provide you with step-by-step instructions to create a Curly Hair Half Sew-In with Braids in the Front.
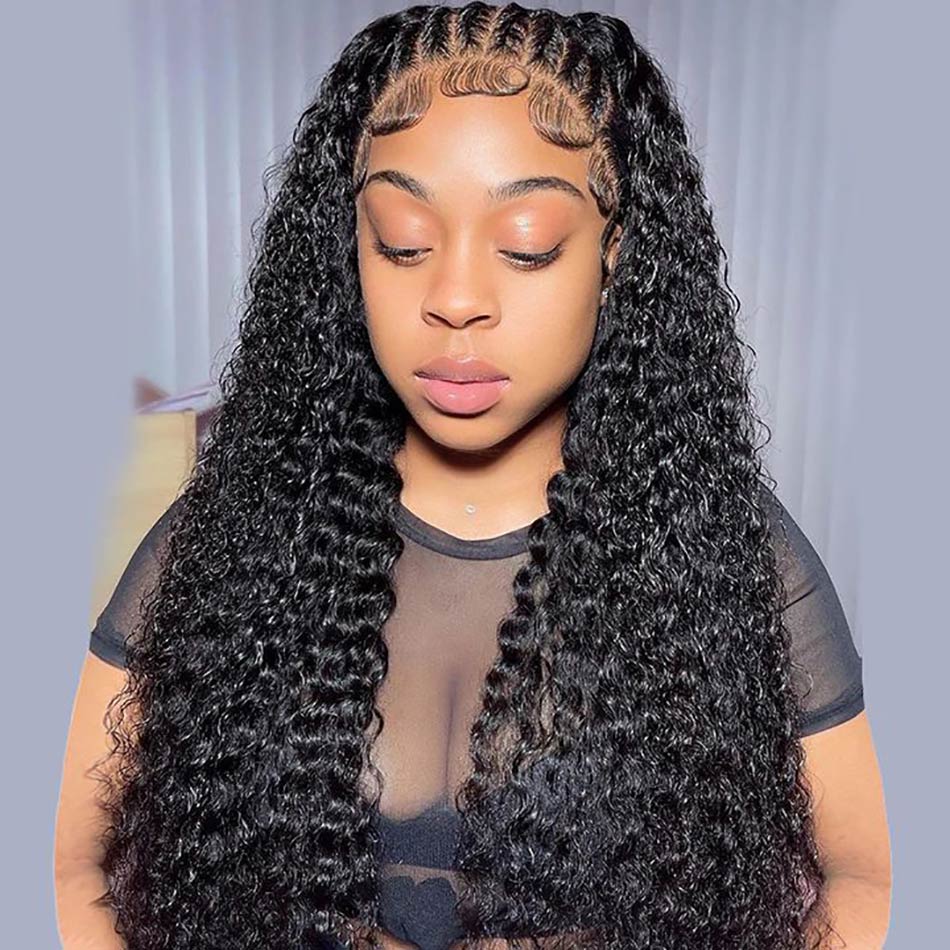
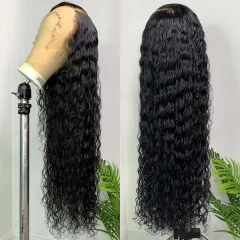
This hairstyle offers a visually striking appearance that is sure to make you stand out. The voluminous and bouncy curls bring an air of playfulness, while the braids in the front section add a unique and fashionable touch to the overall look. This combination results in a head-turning hairstyle that is suitable for a wide range of occasions, from casual outings to formal events. Get ready to embrace your natural beauty and achieve an eye-catching Curly Hair Half Sew-In with Braids in the Front.
Preparing for the curly hair half sew-in with braids in front style
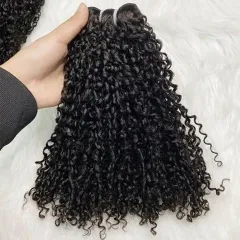
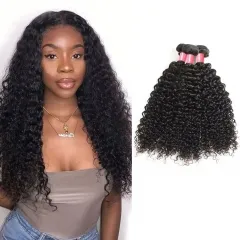
A. Choosing the right type of hair extensions for a seamless blend
Before diving into the tutorial, it's essential to select the appropriate hair extensions that will seamlessly blend with your natural hair. Look for extensions that match your hair texture and color as closely as possible. Opting for high-quality human hair extensions, such as Remy hair, can contribute to a more natural and realistic result.
B. Tips for selecting the appropriate length and texture of extensions
Consider the desired length and texture of your final hairstyle. Choose extensions that match the length you want to achieve or go slightly longer to allow room for trimming and styling. Additionally, ensure that the texture of the extensions closely matches your natural hair to create a seamless and cohesive look.
C. Preparing the extensions for installation
Before installing the extensions, it's crucial to prepare them properly. Start by washing and conditioning the extensions to remove any product buildup or impurities. Gently comb through the extensions to remove any tangles or knots. Allow them to air dry or use a blow dryer on a low heat setting. Style the extensions as desired, whether it's leaving them straight or adding curls or waves.
D. Materials and tools required for the tutorial
To successfully achieve the Curly Hair Half Sew-In with Braids in the Front, gather the following materials and tools:
- Hair extensions suitable for the style
- Rat-tail comb or wide-tooth comb for detangling
- Hair clips or ponytail holders to section the hair
- Hair ties or rubber bands for securing braids
- Sewing needle and thread in a color that matches your hair or extensions
- Scissors for trimming the extensions, if necessary
- Bobby pins or hairpins for securing the sew-in
- Styling products such as leave-in conditioners, heat protectors, and curl-enhancing products
- Heat styling tools (optional) like curling irons or straighteners
- Mirror and good lighting for better visibility during the process
By preparing the right type of hair extensions, selecting a suitable length and texture, ensuring proper washing and styling of the extensions, and gathering the necessary materials and tools, you'll be well-prepared to proceed with the tutorial and achieve the desired Curly Hair Half Sew-In with Braids in the Front.
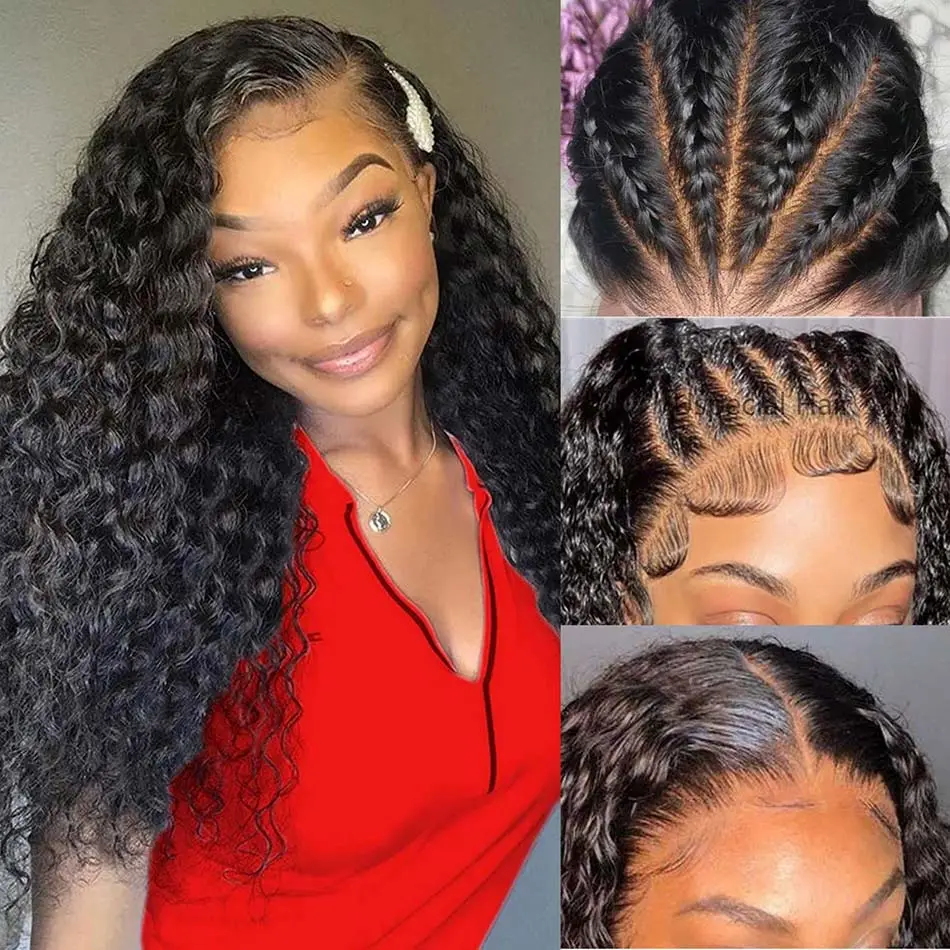
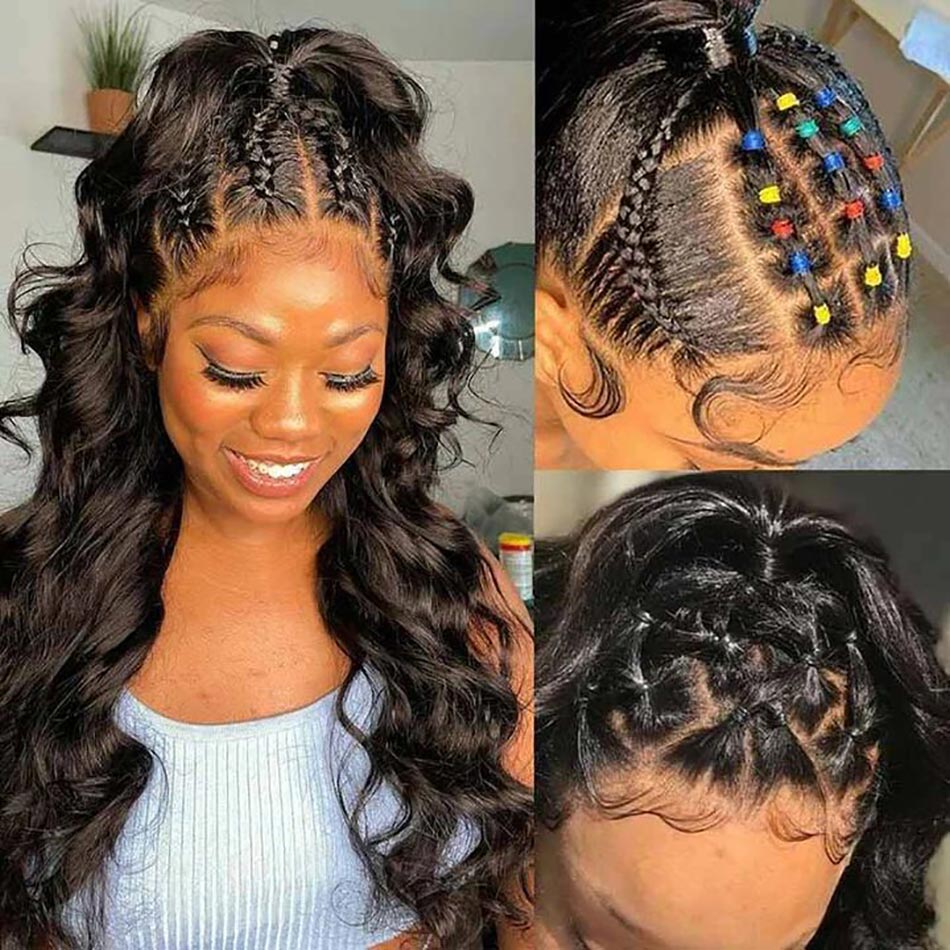
Braiding the Front Section
A. Step-by-step instructions for creating cornrows or individual braids
Achieving the perfect cornrows or individual braids is crucial for the success of your Curly Hair Half Sew-In with Braids in the Front. Follow the step-by-step instruction to create the braids:
Step 1: Start by parting the front section of your hair, separating it from the rest.
Step 2: Take a small subsection of hair from the front and divide it into three equal sections.
Step 3: Begin braiding by crossing the right section over the middle section, then cross the left section over the new middle section.
Step 4: Continue adding hair to each side as you braid, incorporating small sections of hair from the parted section.
Step 5: Continue braiding until you reach the desired length or the end of the section.
Step 6: Secure the braid with a hair tie or rubber band. Repeat the process for the remaining subsections, creating either cornrows or individual braids according to your preference.
B. Tips for achieving neat and secure braids
Neatness and security are key when braiding the front section of your hair. To ensure your braids look polished and stay in place, consider these helpful tips.
Tip 1: Ensure your hair is detangled and smooth before starting the braiding process.
Tip 2: Divide the hair into clean, even sections for a more uniform look.
Tip 3: Use a rat-tail comb or your fingers to section off small, manageable subsections of hair.
Tip 4: Keep the tension consistent while braiding to ensure neatness and prevent the braids from becoming too tight or loose.
Tip 5: If creating cornrows, keep the braids close to the scalp for a sleek and secure finish.
Tip 6: Consider applying a small amount of edge control gel or styling product along the hairline to tame any flyaways and create a polished look.
Tip 7: For added security, you can use hair ties or rubber bands to secure the ends of each braid.
By following these step-by-step instructions and implementing the provided tips, you'll be able to create neat and secure braids in the front section of your hair. This will form the foundation for the Curly Hair Half Sew-In with Braids in the Front hairstyle.
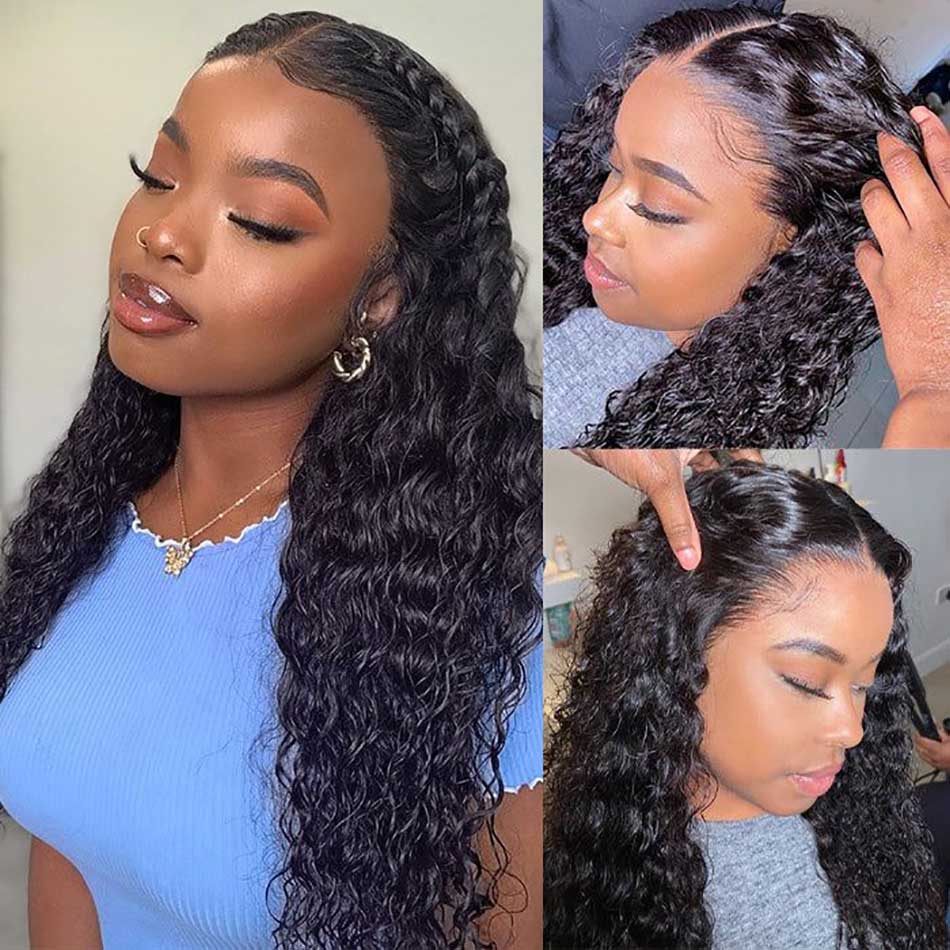
Installing the Sew-In Extensions
A. Step-by-step instructions for installing the extensions
Once you have prepared the front section with braids, it's time to install the sew-in extensions. Follow these step-by-step instructions to ensure a seamless and natural-looking result.
Step 1: Begin by creating a horizontal parting at the back of your head, just above the nape of your neck. Clip the rest of the hair above this parting to keep it out of the way.
Step 2: Take the first weft of hair extensions and measure it against the back parting. Trim the weft if necessary to fit the width of the parting.
Step 3: Apply a thin layer of hair glue or use double-sided hair extension tape along the top edge of the weft.
Step 4: Place the weft onto the parting, aligning it with the roots of your natural hair. Press it firmly to secure it in place.
Step 5: Use a curved needle and thread to sew the weft onto the braids in the front section. Start by inserting the needle through the weft and a braid, then pull the thread through and repeat to create secure stitches along the weft.
Step 6: Continue similarly attaching additional wefts, working your way up the back parting, until you reach the desired height or coverage.
Step 7: Once all the wefts are attached, release the clipped-up hair above the parting and blend it with the sew-in extensions.
B. Tips for achieving a secure and comfortable sew-in
To make the sew-in extensions feel secure and comfortable, consider these helpful tips:
Tip 1: Ensure that the braids in the front section are firm and secure to provide a stable foundation for the sew-in.
Tip 2: Sew the wefts close to the scalp to achieve a flat and natural look.
Tip 3: Use a thread color that matches your natural hair or the extensions for a seamless blend.
Tip 4: Avoid sewing the wefts too tightly, as this can cause discomfort and tension on the scalp.
Tip 5: Distribute the weight of the extensions evenly throughout the head to prevent excessive pulling on specific areas.
Tip 6: Trim or fold the wefts as needed to avoid bulky or visible edges.
Tip 7: Test the sew-in for comfort and adjust any tight areas before proceeding with styling.
Tip 8: Use a wide-tooth comb or your fingers to gently blend your natural hair with the sew-in extensions. This helps create a seamless transition and prevents any visible lines or gaps.
Tip 9: Apply a small amount of leave-in conditioner or hair serum to both your natural hair and the extensions. This helps smoothen the strands and adds shine, enhancing the blend.
Tip 10: Consider using a texture or curling cream to enhance the curl pattern and ensure a cohesive look between your natural hair and the curly extensions.
Tip 11: Avoid using excessive heat or heavy styling products on your natural hair and extensions, as this can cause damage and compromise the blend. Opt for lightweight and heat protector styling options.
Curly Hair Half Sew-In With Braids In Front FAQs:
Q: Can I achieve this style if I have short hair?
A: While longer hair provides more options for blending, it is still possible to achieve this style with shorter hair. Consider using hair extensions to add length and volume before proceeding with the sew-in.
Q: How long can I keep this hairstyle on my head?
A: The duration of the sew-in can vary depending on factors such as the quality of installation, hair care routine, and individual hair growth. On average, a well-maintained sew-in can last for approximately 6-8 weeks.
Q: Can I wash my hair with the sew-in installed?
A: Yes, you can wash your hair with the sew-in installed. However, it's essential to be gentle and avoid excessive manipulation to prevent tangling. Consider using a sulfate-free shampoo and follow proper drying techniques.
Q: How do I maintain the curls in the sew-in?
A: To maintain the curls, you can use a curl-defining cream or mousse and scrunch the hair gently. Avoid brushing or combing the curls vigorously, as this can lead to frizz. Additionally, protect your hair at night by sleeping on a satin or silk pillowcase.
Q: Can I style the sew-in using heat tools?
A: Yes, you can style the sew-in using heat tools such as curling irons or straighteners. However, it's important to use a heat protectant spray before applying heat and to avoid excessive heat to prevent damage to both your natural hair and the human hair extensions.
Q: Can I swim or exercise with the sew-in?
A: While it's possible to swim or exercise with the sew-in, it's important to protect your hair by wearing a swim cap or using a protective style. After swimming, rinse your hair with clean water and apply a leave-in conditioner to maintain moisture.
Q: Can I reuse the sew-in extensions?
A: In some cases, sew-in extensions can be reused. However, it depends on the quality of the extensions and how well they were maintained. Make sure the hair extensions you used are made of 100% human hair, these extensions are more durable and can be reused.
These frequently asked questions cover common concerns and provide additional information about the Curly Hair Half Sew-In with Braids in the Front hairstyle. If you have further inquiries or specific questions, don't hesitate to reach out to a professional stylist for personalized advice.
Conclusion
The Curly Hair Half Sew-In with Braids in the Front hairstyle is a captivating and stylish choice that combines the charm of curly hair with the added charm of braids. It offers a visually striking appearance, with voluminous curls and unique braided details that can make you stand out on any occasion.
Now that you have the knowledge and step-by-step instructions to achieve this stunning hairstyle, we encourage you to unleash your creativity and make it your own. Feel free to customize the size, shape, and placement of the braids to suit your personal style and preference. The possibilities are endless, so have fun and express your individuality through this beautiful hairstyle.
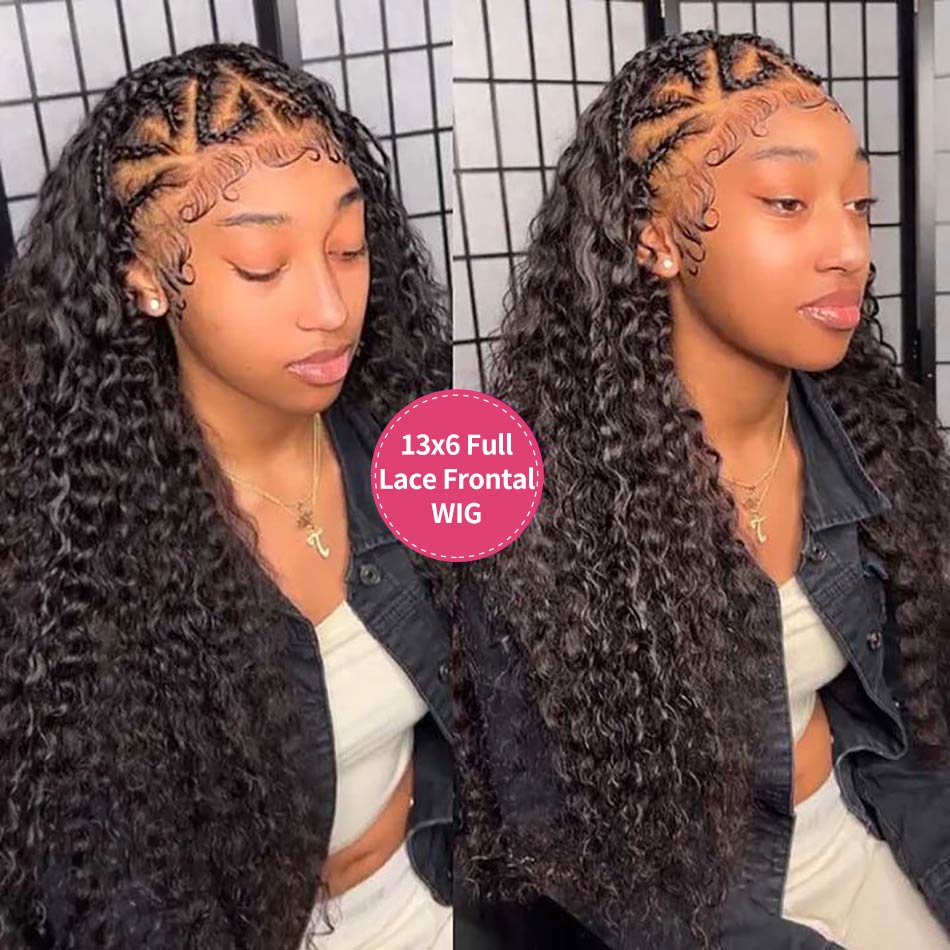
If you're looking to enhance your natural curls or add length and volume to this hairstyle, consider exploring the range of 100% natural curly hair options available at Elfin Hair. Their high-quality hair extensions can seamlessly blend with your natural hair, providing a flawless and realistic look. If you don't want to spend so much time in the sew-in process but still desire a full half braids half curly style, investing in a full lace wig or 13x6 lace wig is also a sensible choice. The 13x6 lace wig comes with a skin-melted big lace that allows you to braid in the front to achieve a seamless half braids half half braid half curls style while the price is also adorable. Embrace the convenience and versatility of Elfin Hair's products to achieve a charming half braid half curls style.
Embrace your unique style, you can confidently rock this chic and captivating look. Let your confidence shine, experiment with different variations, and enjoy the beauty of this remarkable hairstyle.
 47%
47%
OFF Sale-
$88.63
$168.40(652) (451)

 47%
47%
OFF Sale-
$88.63
$168.40(1883) (530)

 47%
47%
OFF Sale-
$88.63
$168.40(1372) (1165)

 47%
47%
OFF Sale-
$88.63
$168.40(803) (1025)

 40%
40%
OFF Sale-
$188.06
$314.06(368) (366)

 40%
40%
OFF Sale-
$184.06
$307.38(368) (397)

 40%
40%
OFF Sale-
$113.86
$190.15(1064) (1181)

 40%
40%
OFF Sale-
$175.72
$293.45(456) (342)

Related Posts:
20 Stunning Tape-In Extensions Hairstyles You Shouldn't Miss
Ponytail Hairstyles For Black Hair
20 Chic Protective Hairstyles For Black Women
Light Yaki Hair: Tips, Tricks, And Effortless Style