 USD
USD EUR
EUR GBP
GBP CAD
CAD AUD
AUD
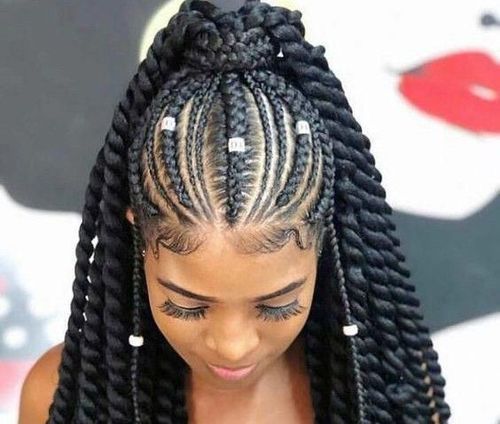
How To Braid Hair With Extensions?
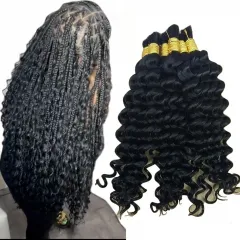
Hair extensions add length and volume to your natural locks and offer more versatility for braided styles. With a bit of practice, you can also be your own expert on beautifully braided hair. Here in this post, we will show you how to braid your hair with hair extensions and 8 chic braided styles for your next hairstyle inspiration.
Tutorial on braiding hair with extensions
To braid hair with extensions, you will need the following materials:
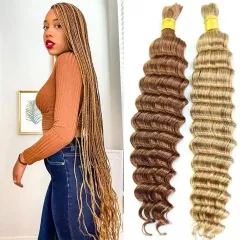
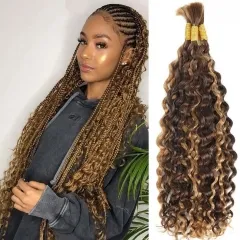
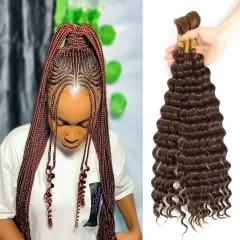
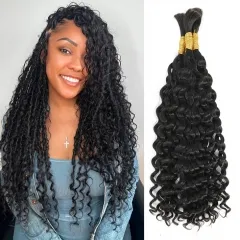
- Hair extensions in your desired color and length (make sure you buy 100% human hair extensions)
- A rattail comb
- Hair elastics
- Braid spray or water
Instructions:
Step 1: Start by shampooing and conditioning your locks and hair extensions. Then brush your hair and extensions to remove any tangles.
Step 2: Section off a small section of hair from the top of your head with a rattail comb. Take a small section of the extensions and braid the section of hair and extensions together. Begin with a basic three-strand braid, adding small sections of hair from the extensions as you braid, until you reach the end of your hair. Secure the ends of the braid with hair elastics.
Step 3: Repeat the braiding process and add hair extensions to the outer strand as you desire. Repeat the process until the entire hair is braided.
Step 4: Apply braid spray or mist with water to help set the braids and add moisture to the hair.
Step 5: Style as desired. You can pull all the braids into a neat ponytail or wrap the braids into buns as you desire.
Note: You can also add extensions to braids by braiding them into the hair before braiding it all together.
Gorgeous braiding styles with extensions
Apart from the basic three-strand braiding style, there are so many protective braiding styles for you girls to rock. This section will cover 8 chic and quick protective braiding styles for Afro hair. Keep scrolling and get your next hairstyle inspiration!
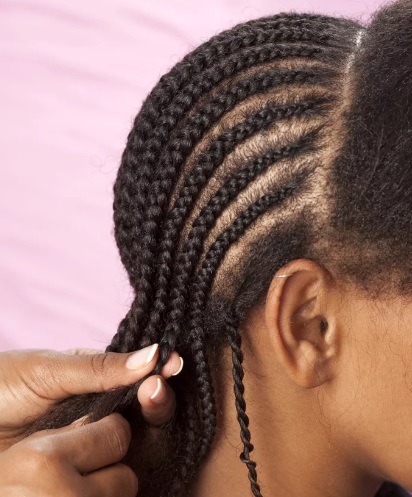
Box Braids
Box braids are a hairstyle where the hair is braided using small square-shaped sections, or "boxes," which give the braids their distinctive appearance. The braids are usually made using hair extensions. They can be styled in a variety of ways, such as being left loose or pulled back into a ponytail or bun. Box braids can be a low-maintenance and protective hairstyle option, but they can also cause hair breakage and traction alopecia if not done or maintained properly.
We have made a detailed tutorial about how to create box braids with no damage: Tutorial: Quick & Easy Jumbo Box Braids! Click and explore!
Crochet Braids
Crochet braids are a type of hairstyle that involves using a crochet hook to attach hair extensions to your natural hair. The hair is braided into cornrows, and the extensions are then crocheted onto the braids. This method allows for a versatile and customizable hairstyle that can mimic a variety of textures, such as kinky curls, loose waves, or straight hair. It is also relatively low-maintenance and can last for several weeks with proper care and maintenance.
We have also made a tutorial on how to create a crochet weave with hair extensions. Click and explore: How to crochet braids with weave?
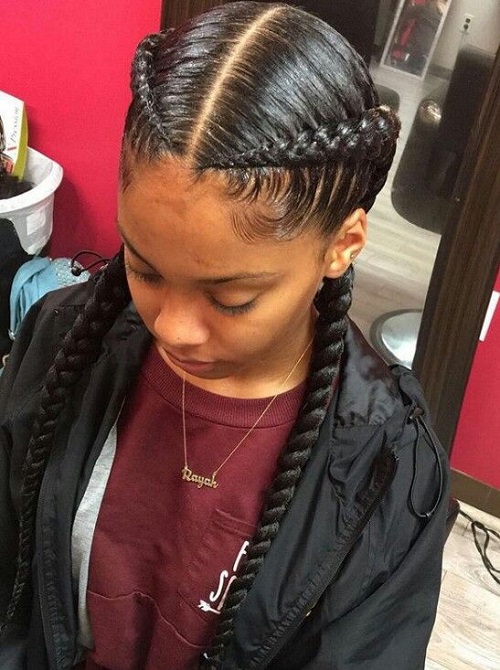
Dutch Braids
Dutch braids are a type of braid where the braid is woven under instead of over sections of hair. This creates a raised, three-dimensional braid that stands out on the head. They are a popular hairstyle for both everyday wear and special occasions and can be styled in a variety of ways, such as in a ponytail or bun. They can also be used as a base for other hairstyles, such as a fishtail braid or a crown braid.
Here are some steps to create Dutch braids with extensions:
- Gather your extensions and hair tools such as a comb, hair clips, and elastic bands.
- Section your hair into three equal parts, with one section at the top of your head and two sections on either side.
- Take the top section of your hair and divide it into three equal parts.
- Take the left section and cross it over the middle section, then take the right section and cross it over the middle section.
- Take a small piece of hair from the left side and add it to the left section before crossing it over the middle section. Repeat this step on the right side.
- Continue this process, adding extensions as you braid.
- Once you reach the end of your hair, secure the braid with an elastic band.
- Repeat the process on the other side, ensuring that the braids are even and tight.
- Finish by styling your hair as desired.

Faux Locs
Faux locs, also known as faux dreadlocks, are a popular hairstyle that mimics the look of traditional dreadlocks. They are made by braiding or twisting hair extensions into natural hair, creating a textured, curly look. Faux locs are a convenient option for people who want the look of dreadlocks without the commitment of growing and maintaining real dreadlocks. They can also be a great option for people with fine or thin hair, as hair extensions add volume and thickness to natural hair. However, it is important to note that faux locs can be heavy on the scalp and may cause hair loss if not installed or maintained properly.
We have provided detailed instructions for creating faux locs. Click and explore: How To Do Faux Locs? Here is also a super detailed tutorial on how to get faux locs by wrapping your hair:
Yarn Braids
Yarn braids are a type of hairstyle that involves braiding hair extensions into your hair. This type of braid is often used as an alternative to traditional braids because it can add a unique look and texture to your hair. Yarn braids can be styled in a variety of ways, including traditional braids, twists, or dreadlocks. They are also a popular choice for those with natural hair as they can add length and thickness without the use of hair extensions. Yarn braids can be maintained with regular washing and conditioning, but they should be avoided in water activities as they can become waterlogged and heavy.
Here are some steps to achieve quick and gorgeous yarn braid styling:
- Start by sectioning your hair into the desired number of braids. It's advisable to work with clean, dry hair that has been detangled.
- Next, measure out the yarn you will be using for each braid. The length of the yarn should be at least three times the length of your hair.
- Take one section of hair and separate it into three equal parts. Then, take one strand of yarn and place it over the middle section of the hair.
- Hold the yarn in place with your fingers and begin braiding the hair and yarn together. Make sure to keep the yarn in the middle section of the braid and the hair on either side.
- Once you reach the end of the braid, tie the yarn off with a clear elastic band. Repeat this process for each section of hair.
- Once all of your braids are complete, you can add beads or other decorations to the ends of the yarn.
- To remove the yarn braid, simply cut the yarn close to the elastic band and gently unravel the braid.
Marley Twists
Marley twists are a type of protective hairstyle that is popular among African American women. They are similar to traditional twists but use a type of hair extension called Marley hair. The twists are usually braided or twisted in a spiral pattern and can be styled in various ways. They are a suitable option for those looking to protect their natural hair while still being able to achieve a variety of different hairstyles.
Here is a simple tutorial to create Marley twists:
- Start with clean, detangled hair. Divide your hair into two equal sections and clip one section out of the way.
- Take a small section of hair from the unclipped section and divide it into two equal parts.
- Take a small piece of Marley hair and lay it over the two sections of your hair.
- Twist the three sections of hair (your hair and the Marley hair) together tightly.
- Repeat steps 2-4 until you have reached the desired amount of twists.
- Once you have completed one section of your hair, unclip the other section and repeat the process.
- Once you have completed both sections of your hair, you can either leave the twists as is or style them in a bun or ponytail.
- To maintain your Marley twists, make sure to keep them moisturized and avoid excessive manipulation. You can also wrap them at night to protect them.
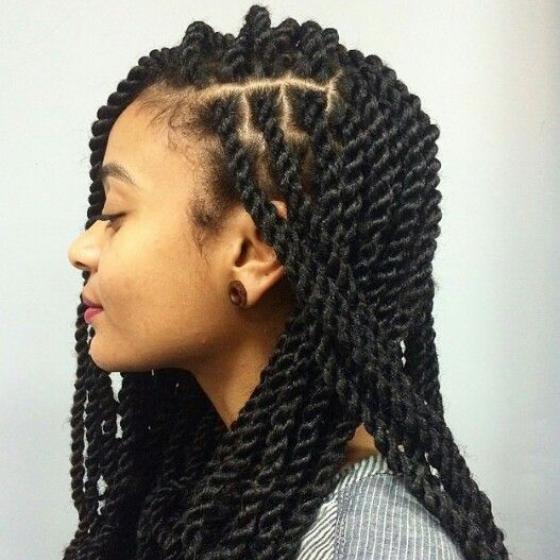

Senegalese Twists
Senegalese twists are a type of hairstyle that originated in Senegal, West Africa. They are also known as rope twists or yarn twists. The hair is braided tightly and twisted together, creating a rope-like appearance. The braids can be styled in various ways and are often worn as an alternative to traditional braids or as a protective hairstyle. They can be done with synthetic hair or natural hair and can be left in for several weeks.
Here are some steps to create Senegalese twists:
- Start by sectioning your hair into small, even sections. Use hair clips to keep each section separate.
- Take one section of hair and divide it into two equal parts. Hold one part in each hand.
- Twist one part of the hair clockwise, and the other part counterclockwise. Keep twisting until you reach the ends of the hair.
- Take the two twisted sections and twist them together, starting at the roots and working your way down to the ends. Make sure to keep the twists tight and smooth.
- Repeat steps 2-4 on each section of hair until your entire head is covered in Senegalese twists.
- Once your twists are complete, you can either leave them loose or style them in a bun or ponytail. You can also use hair accessories like beads or bands to add some extra flair.
- Make sure to moisturize your hair and twists regularly to keep them healthy and shiny.
Ghana Weaving
Ghana weaving, also known as banana weaving or Ghana braiding, is a traditional hairstyling technique that originated in Ghana. It involves braiding the hair into a variety of intricate patterns and designs, often incorporating extensions or beads. It is a popular hairstyle in West Africa and has gained popularity in other parts of the world as well. It is often considered a protective hairstyle as it helps to keep natural hair healthy and strong.
Here are a few steps to create Ghana braids:
- Start by separating your hair into small sections.
- Take one section of hair and divide it into three equal parts.
- Begin braiding the three sections of hair together, adding small sections of hair from the side of your head as you braid.
- Repeat this process on all sections of your hair, making sure to add hair from the side of your head as you braid.
- Continue braiding until you reach the ends of your hair.
- Secure the ends of the braids with elastic bands or beads.
- Repeat the process on the rest of your hair until you have the desired number of braids.
- You can style your Ghana braids by pulling them back into a ponytail or leaving them down.

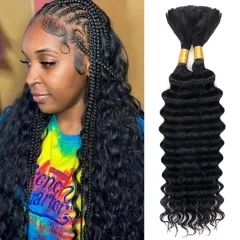
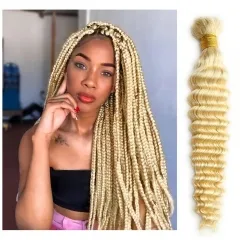
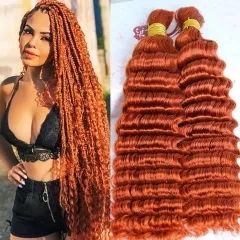
The above-mentioned gorgeous hairstyles are all achieved by braiding hair and attaching hair extensions. To create the most stunningly gorgeous braided style, 100% human hair extensions are the best option. This type of hair is healthier and tangles less. Elfin Hair provides 100% virgin hair extensions for braided styles, including braiding hair, weft hair, clip-in hair extensions, tape-in hair extensions, etc. Click to visit the ElfinHair online hair store.
 40%
40%
OFF Sale-
$68.08
$113.69(623) (421)

 40%
40%
OFF Sale-
$77.44
$129.32(416) (313)

 40%
40%
OFF Sale-
$70.42
$117.60(416) (387)

 40%
40%
OFF Sale-
$70.42
$117.60(415) (413)

 40%
40%
OFF Sale-
$70.42
$117.60(415) (370)

 40%
40%
OFF Sale-
$68.08
$113.69(415) (325)

 40%
40%
OFF Sale-
$68.08
$113.69(623) (399)

 40%
40%
OFF Sale-
$68.08
$113.69(623) (367)

Related Posts:
Two Strand Twist With Extensions: All You Should Know